

As I mentioned in my Dean Does Lately 1 Year Old post I put together a photo collage to show his physical growth over the past year. To put together the collage, I used the grid feature on Canva. This post is a tutorial on how to use Canva's grid to make your own.
CANVA PROGRAM
Canva is a free website program that allows you to create your own graphic designs. The reason I like using it so much besides it being free - it starts off with a selection of graphic size. Since I've started blogging again, everyone stresses the important of graphics, specifically for Pnterest. As I've read over and over again, Pinterest prefers long images. I've also read on many blogs and blog posts offering growth tips that Pinterest has a huge impact on growing your following and page views. Canva has a default design called Blog Graphic, which is 800px x 1200px in size. This size is also great for Pinterest and 99% of the time, the design I chose when creating graphics for my posts.
STEP BY STEP TUTORIAL
CREATE A PHOTO COLLAGE


The top half of the image above captures the new window tab that opens once you select Blog Graphic. You can see that the image is titled Blog Graphic Untitled and the long rectangular blank white space is where you create your blog graphic. On the left side, which I've zoomed in on the bottom half of the image above captures the menu. You can see the default is Layouts. Next to the menu are Layout options. Canva features a mix of free and priced Layouts. If you hover your mouse over the Layout, it will indicate in the right bottom corner whether or not it's free.
Next, I'm going to focus on Uploads.

The next two steps are interchangeable (upload your photos or laying grid onto your blank space), but I recommend uploading the photos you want in the collage. In the image above, you can see my uploaded photo reel associated with my Canva account. If this is your first time using Canva, refer to the second image, which shows how to drag & drop your photos in.

Click on Uploads on the left hand menu and then open your computer folder to grab your photos. As you can see in the photo, the folder can overlay on top of the open webpage, select the file and then drag it so it's over the empty space available for Uploads. You'll see the white arrow and know that the file is being recognized by Canva. Please note - it can only take image files - you can't save PDFs in this space. Once you see the white arrow, drop the file and it should appear in your Uploads reel in seconds.
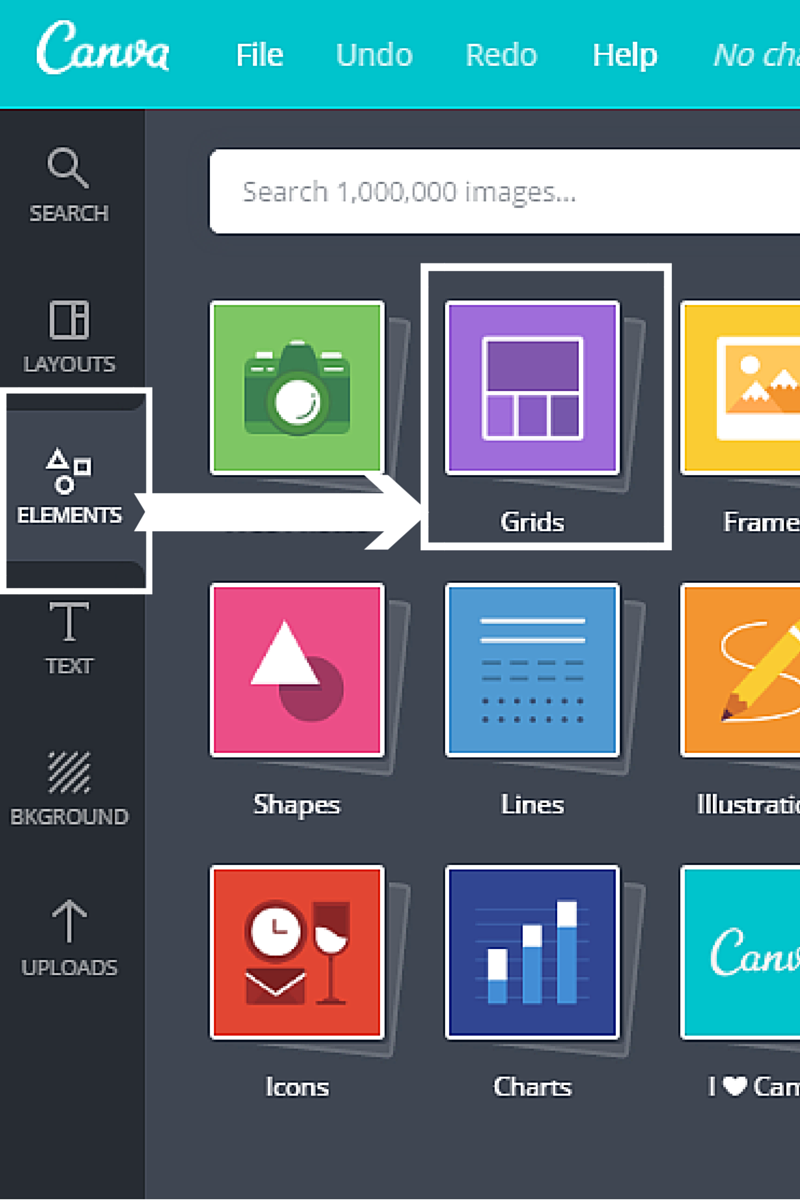
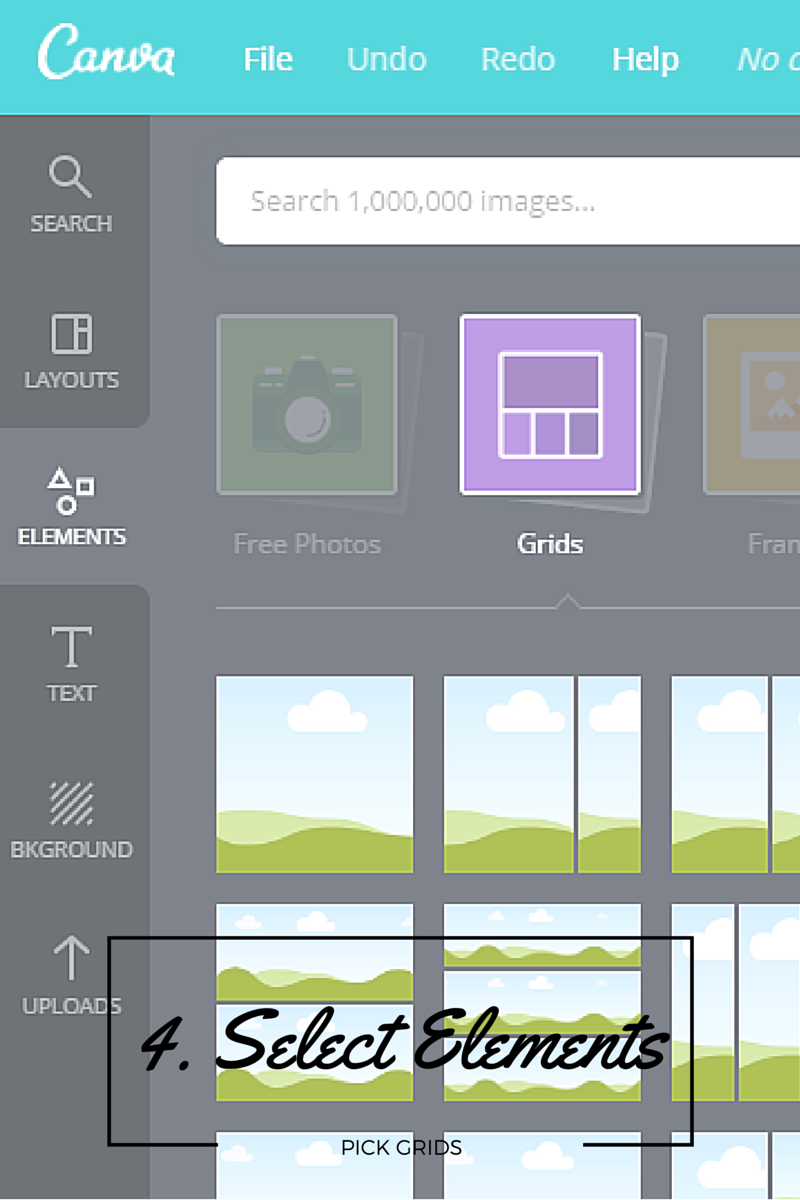
After uploading your images, next step is using Canva's elements. Canva has a lot of useful elements, but for this tutorial we're focusing on Grids. In the first image, I've highlighted Grids and in the second image, you see the grid options. Grids covers the design space with sized out frames that fills the full space. There are tons of different options that Canva provides depending upon orientation and number of photos you'd like in your design.
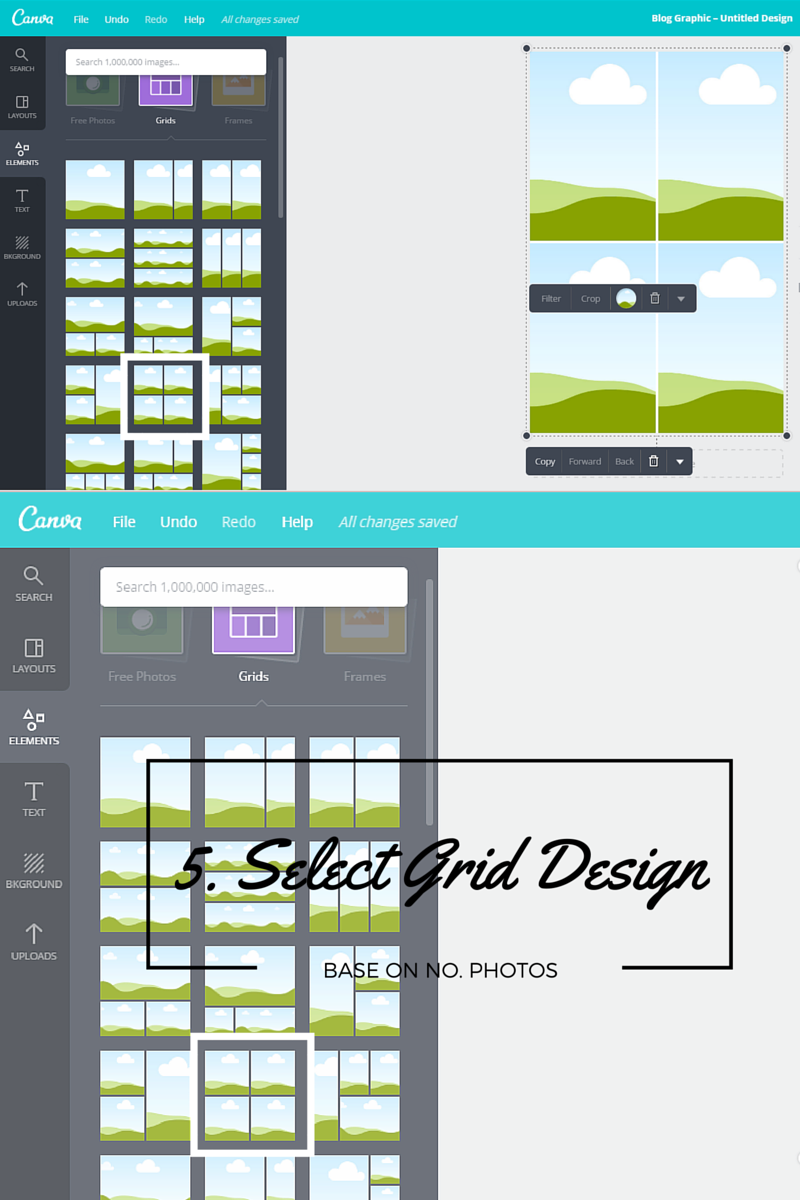
For purposes of this tutorial, I'm using the 4 grid picture design. Once you've clicked on grids and see the options, click on the 4 grid picture. It will automatically propagate the grid onto your design space and look like the picture below.

Now you are ready to load your pictures onto the grids.

You have the grid in place. Now go back to Uploads and find your picture. In the top half of the image, I've highlighted the chosen picture. Place your mouse over the image and drag the picture over the grid to the chosen frame - here it's the top left corner. In the bottom half of the image, you can see the blank space where we've dragged the picture and hovered it over the top corner of the grid. Drop the image in place.
Here is what it looks like.

Now you can spend time adjusting the photos within the frame. For the example, let's get rid of the dog food container in the image.

First, select Crop outlined in black. The picture will be highlighted by dotted lines and 4 circles in each of the corners, which you can use to drag the picture and its placement or zoom in.

Below I've zoomed in so we can remove the dog food container from the picture background.

Once you're happy with the picture in the frame, you click on the check mark, which is highlighted. Below is the final product.


Once you've completed your collage, name the file in the upper right corner and download the file (highlighted by the square).

I hope you found this tutorial useful. As I mentioned at the beginning of the post, I use Canva all the time to create my blog graphics. If you do not have access to Microsoft products or design programs, Canva is easy to use and free. Do you use Canva? If you use other design programs, what do you prefer?
This post has been shared on these link up parties.


Love what you did with the month by month photos. We have photos like that of our son as well but I never thought about turning it into a collage using Canva! I typically use Canva for blogging. Thanks for the great idea. Found your post on Wonderful Wednesday
ReplyDeleteNicole | The Professional Mom Project
Thanks so much Nicole! I love using Canva for the blog.
ReplyDeleteOooh what a helpful tutorial! Thanks for sharing at #FridayFrivolity!! Pinning and tweeting!
ReplyDelete